Refractory Concrete (Castables): Essential Tips You Should Know for Steel Industry Applications
Refractory concrete, also known as refractory castables or monolithic refractories, plays a critical role in steel industry operations. Unlike traditional construction concrete, refractory concrete is specially formulated to withstand extreme temperatures (up to 1800°C), thermal shock, chemical attack, and mechanical stress in furnaces, ladles, tundishes, and other high-temperature equipment. Understanding how to select, install, and maintain refractory castables can significantly improve furnace performance, reduce downtime, and lower operational costs.
This comprehensive guide provides essential tips and best practices for working with refractory concrete in steel manufacturing environments, from material selection through installation, curing, and maintenance.
1. Understanding Refractory Concrete Types
Low Cement Castables (LCC)
Composition:
- Cement content: 2.5-8%
- Aggregate: High-alumina, silica, or other refractory materials
- Additives: Deflocculants, accelerators, fibers
Advantages:
- Lower porosity (12-18%)
- Better hot strength
- Improved thermal shock resistance
- Reduced spalling tendency
- Lower installation water requirement
Applications:
- Ladle linings
- Tundish working linings
- Furnace roofs and walls
- Reheat furnaces
Price Range: $400-800/ton
Tip: LCC is the workhorse of steel industry - offers best balance of performance and cost
Ultra-Low Cement Castables (ULCC)
Composition:
- Cement content: <2.5%
- Higher quality aggregates
- Advanced bonding systems
Advantages:
- Very low porosity (8-12%)
- Excellent hot strength
- Superior corrosion resistance
- Minimal thermal expansion
- Extended service life (30-50% longer than LCC)
Applications:
- Critical wear zones
- High-temperature applications (>1400°C)
- Corrosive environments
- Premium ladle linings
Price Range: $800-1,500/ton
Tip: Higher initial cost justified by 30-50% longer service life in demanding applications
No-Cement Castables (NCC)
Composition:
- Zero cement content
- Colloidal silica or other binders
- Premium aggregates
Advantages:
- Lowest porosity (5-8%)
- Maximum hot strength
- Best corrosion resistance
- Minimal creep
- Excellent thermal properties
Applications:
- Most severe service conditions
- Petrochemical applications
- Special steel industry needs
Price Range: $1,500-3,000/ton
Tip: Use only when extreme conditions justify the premium cost
Self-Flow Castables
Composition:
- Similar to LCC/ULCC but with flow additives
- No vibration required
Advantages:
- Easier installation
- Better filling of complex shapes
- Reduced labor requirements
- More consistent density
- Faster installation time
Applications:
- Complex geometries
- Areas difficult to vibrate
- Rapid repair situations
- Precast shapes
Price Range: $600-1,200/ton
Tip: Can reduce installation time by 40-60% - excellent for shutdowns with time constraints
2. Material Selection Tips
Matching Castable to Service Conditions
Temperature Considerations:
| Temperature Range | Recommended Type | Key Properties |
|---|---|---|
| <1000°C | Standard LCC | Good insulation, economical |
| 1000-1400°C | Premium LCC or ULCC | Balanced properties |
| 1400-1600°C | ULCC or specialized | High strength, low creep |
| >1600°C | NCC or special formulations | Maximum performance |
Chemical Environment:
- Acidic slag: Silica-based castables
- Basic slag: Magnesia or magnesite-based castables
- Neutral: Alumina-based castables (most common)
- High alkali: Special alkali-resistant formulations
Mechanical Stress:
- High abrasion: Add steel or stainless steel fibers
- Thermal cycling: Include organic or ceramic fibers
- Impact zones: Use high-density, high-strength grades
Key Performance Indicators to Check
Before Purchase, Verify: ✓ Cold crushing strength (CCS): Minimum 40-60 MPa ✓ Refractoriness under load (RUL): >1400°C for most applications ✓ Permanent linear change: ±0.5% maximum ✓ Thermal conductivity: Match to application (insulating vs. conductive) ✓ Maximum service temperature rating ✓ Setting time and working time ✓ Water requirement for mixing
Tip: Always request certified test data - don't rely on supplier claims alone
Common Selection Mistakes to Avoid
- Choosing based on price alone: Cheapest often costs more through shorter service life
- Over-specifying: Using premium materials where standard would suffice
- Under-specifying: Using standard materials in demanding applications
- Ignoring compatibility: Not considering adjacent refractory materials
- Neglecting installation conditions: Not accounting for available equipment and skills
3. Storage and Handling Tips
Proper Storage
Critical Requirements:
- Store in dry, covered warehouse
- Keep off ground on pallets (minimum 15cm elevation)
- Maintain temperature above 5°C
- Protect from moisture (use plastic covers if needed)
- Use within 6 months of manufacture (3 months for self-flow types)
- Rotate stock - first in, first out (FIFO)
Shelf Life by Type:
- Standard LCC: 6 months
- ULCC/NCC: 3-6 months
- Self-flow: 3 months
- Pumping mixes: 2-3 months
Warning Signs of Material Degradation:
- Lumping or hardening
- Moisture stains on packaging
- Expired date
- Damaged packaging
- Unusual odor
Tip: Moisture is the enemy - one damp bag can ruin an entire installation
Pre-Installation Preparation
Equipment Checklist:
- High-shear mixer (mandatory for most castables)
- Vibrators (internal and external)
- Clean mixing containers
- Measuring equipment for water
- Installation tools (trowels, screeds)
- Safety equipment (PPE)
- Formwork and anchoring system
- Curing materials
Surface Preparation:
- Remove all loose material and debris
- Clean existing refractory surfaces
- Install new anchors if required
- Check formwork is secure and leak-tight
- Apply form release agent
- Ensure substrate is dry (moisture causes steam during heat-up)
Tip: 70% of installation problems stem from poor preparation - invest time here!
4. Mixing Tips for Optimal Performance
Water Addition - The Critical Factor
Golden Rule: Use ONLY the recommended water percentage - typically 5-8% for LCC/ULCC
Why Water Content Matters:
- Too much water (>8%): Higher porosity, lower strength, increased shrinkage, shorter service life
- Too little water (<5%): Poor workability, incomplete hydration, voids, weak bonding
Measuring Water Accurately:
- Use graduated containers or flow meters
- Measure by weight, not volume
- Account for moisture in aggregates if adding
- Never add extra water to improve flow
- Use dispersants instead if more flow needed
Tip: Every 1% excess water can reduce strength by 10-15% and service life by 20-30%
Mixing Procedure
Step-by-Step Process:
-
Pre-Mixing (30-60 seconds):
- Add dry material to mixer first
- Run mixer to break up any lumps
- Ensure uniform dry material
-
Water Addition (30 seconds):
- Add 80% of water gradually while mixing
- Use cold water (10-20°C optimal)
- Add remaining 20% slowly until desired consistency
-
Main Mixing (3-5 minutes):
- LCC: 3-4 minutes
- ULCC/NCC: 4-5 minutes
- Self-flow: 5-6 minutes
- Achieve uniform consistency
-
Quality Check:
- Test consistency (ball test or flow test)
- Check for lumps
- Verify uniform color and texture
Common Mixing Mistakes:
- Insufficient mixing time - weak spots and inconsistent properties
- Over-mixing - air entrainment and segregation
- Wrong mixer type - paddle mixers inadequate for modern castables
- Dirty mixer - contamination from previous batch
- Incorrect water measurement - most common problem
Mixer Requirements:
- High-shear pan mixer (preferred)
- Minimum 30-40 RPM
- Capacity appropriate for job size
- Clean and in good condition
Tip: Invest in a good mixer - it's the difference between success and failure
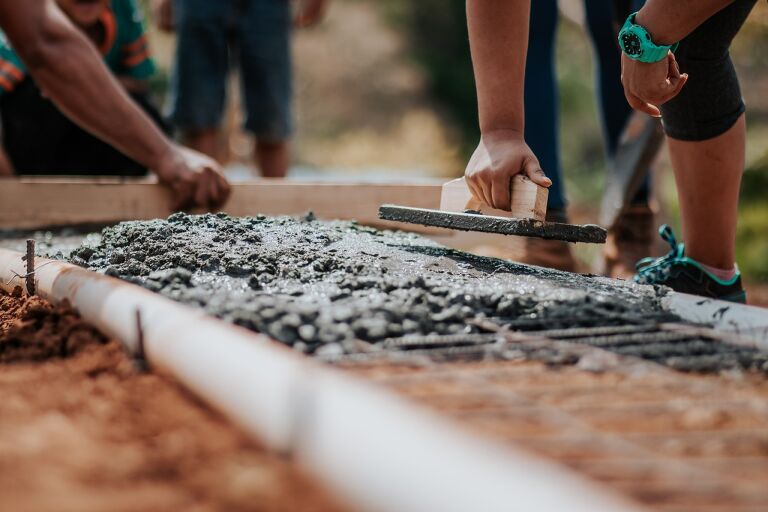
5. Installation Techniques
Vibration Casting
When to Use: Most common method for LCC and ULCC
Vibration Guidelines:
- Frequency: 10,000-12,000 vibrations/minute
- Duration: Until air bubbles stop rising (typically 10-30 seconds per location)
- Spacing: Every 300-500mm
- Depth: Insert vibrator to 2/3 of layer thickness
- Technique: Slow insertion, quick withdrawal
Layer Thickness:
- Maximum per layer: 150-200mm
- Thinner layers for critical areas: 100mm
- Complete each layer before starting next
- No more than 30 minutes between layers
Common Vibration Errors:
- Over-vibration - segregation and surface weakness
- Under-vibration - voids and low density
- Vibrating too close to formwork - honeycomb surface
- Leaving vibrator in one position too long
- Not overlapping vibration zones - weak spots
Tip: "Just right" vibration takes experience - train installers thoroughly
Pumping Application
When to Use: Large volume installations, difficult access areas
Pumping Requirements:
- Special pumping-grade castables
- High-pressure concrete pump
- Skilled operators
- Continuous operation (no stops)
Pumping Tips:
- Maximum horizontal distance: 100m
- Maximum vertical distance: 30m
- Pipe diameter: Minimum 50mm
- Prime pump with mortar first
- Maintain steady pressure
- Clean system immediately after use
Advantages:
- Faster installation (3-5× faster)
- Better access to difficult areas
- More consistent density
- Reduced labor requirements
Challenges:
- Higher equipment cost
- Requires specialized material
- Limited working time
- Difficult to stop/restart
Gunning/Shotcreting
When to Use: Repairs, linings on vertical surfaces, fast turnaround
Gunning Methods:
- Dry gunning: Material and water mixed at nozzle
- Wet gunning: Pre-mixed material sprayed
Keys to Success:
- Maintain perpendicular angle to surface
- Keep consistent distance (0.5-1.5m)
- Minimize rebound (15-20% typical)
- Trim excess immediately
- Work in sections for consistent thickness
Best Applications:
- Repairs and patching
- Tundish linings
- Ladle sidewalls
- Emergency fixes
6. Curing and Dry-Out Tips
Initial Curing (First 24-72 hours)
Objectives:
- Allow proper hydration
- Develop green strength
- Prevent rapid moisture loss
- Avoid cracking
Curing Methods:
Ambient Curing (most common):
- Cover with plastic sheeting
- Maintain temperature >10°C
- Protect from drafts and direct sun
- Allow 24 hours before formwork removal
- Minimum 48-72 hours before heating
Accelerated Curing (when time-critical):
- Use heated enclosures
- Maintain 30-40°C
- Still require minimum 16-24 hours
- Higher risk if not done properly
Tip: Patience during curing prevents problems later - resist pressure to rush
Dry-Out Schedule
Why Proper Dry-Out is Critical:
- Remove chemically bound water
- Prevent explosive spalling
- Develop final strength
- Minimize shrinkage cracks
Standard Dry-Out Schedule (for 300mm thick lining):
| Temperature | Hold Time | Rate of Increase |
|---|---|---|
| 110°C | 24 hours | 25°C/hour |
| 260°C | 12 hours | 25°C/hour |
| 540°C | 12 hours | 50°C/hour |
| 815°C | 6 hours | 50°C/hour |
| 1095°C | 3 hours | 100°C/hour |
Adjust for:
- Thicker sections: Increase hold times
- Self-flow castables: Slower initial rates
- ULCC/NCC: May require slower rates
- High-moisture environments: Extended initial hold
Critical Temperature Zones:
- 100-150°C: Free water removal - most critical
- 250-300°C: Chemically bound water
- 400-600°C: Organic burnout
- >900°C: Ceramic bonding develops
Monitoring During Dry-Out:
- Watch for steam release (normal at 100-300°C)
- Check for cracks (minor cracks <1mm acceptable)
- Monitor temperature rise rates
- Listen for popping sounds (may indicate too-fast heating)
Emergency Indicators to Stop Heating:
- Excessive steam (like fog)
- Loud cracking or explosive sounds
- Pieces falling off
- Visible structural damage
Tip: A good dry-out schedule is worth 50% of service life - never rush this step!
7. Common Problems and Solutions
Problem 1: Cracking During Dry-Out
Symptoms: Hairline to large cracks appearing during heat-up
Causes:
- Too-fast heating rate
- Excessive water in mix
- Thermal shock
- Restrained expansion
- Inadequate curing
Solutions: ✓ Slow heating rate (especially 100-300°C) ✓ Use proper water content ✓ Ensure adequate curing before heat-up ✓ Provide expansion joints ✓ Check anchor spacing
Prevention Tips:
- Follow recommended dry-out schedule strictly
- Monitor temperature rise with pyrometers
- Allow longer holds at critical temperatures
- Ensure uniform heating
Problem 2: Spalling or Explosive Failure
Symptoms: Pieces breaking off violently during heat-up
Causes:
- Trapped moisture
- Too-rapid heating
- Steam pressure buildup
- Inadequate dry-out
Solutions: ✓ Stop heating immediately ✓ Cool slowly to room temperature ✓ Restart with slower schedule ✓ Extend hold times at low temperatures
Prevention Tips:
- Never rush dry-out schedule
- Pay special attention to thick sections
- Ensure material was dry before installation
- Provide adequate venting
Problem 3: Low Strength After Installation
Symptoms: Material crumbles or shows weak bonding
Causes:
- Incorrect water addition (too much)
- Inadequate mixing
- Poor vibration
- Contamination
- Material degradation
Solutions: ✓ Remove and reinstall if severe ✓ Verify material quality ✓ Check mixing and installation procedures ✓ Test remaining material
Prevention Tips:
- Measure water accurately
- Mix thoroughly (3-5 minutes minimum)
- Vibrate properly
- Use fresh material within shelf life
- Store properly
Problem 4: Poor Surface Finish
Symptoms: Honeycomb, voids, or rough surface
Causes:
- Over-vibration near formwork
- Poor formwork preparation
- Air trapped at surface
- Segregation during placement
Solutions:
- May be cosmetic only if interior is sound
- Can apply surface coating if needed
- Severe cases may need removal
Prevention Tips:
- Don't vibrate directly against forms
- Use proper release agents
- Fill forms in continuous operation
- Tap formwork lightly to release air
8. Repair and Maintenance Tips
When to Repair vs. Replace
Repair is Suitable When:
- Damage is localized (<20% of area)
- Structure is sound
- Erosion depth <30% of thickness
- No structural concerns
- Quick turnaround needed
Complete Replacement Needed When:
- Extensive damage (>30% of area)
- Through-thickness cracks
- Structural integrity compromised
- Poor original installation
- Planned major overhaul
Repair Techniques
Gunning Repairs:
- Best for spot repairs
- Fast application
- Good bonding to existing material
- Prepare surface by cleaning and roughening
Patch Repairs:
- Remove damaged material completely
- Cut clean edges (no feathering)
- Clean and wet surface
- Use rapid-setting repair material
- Ensure good compaction
Hot Repairs (under fire):
- Use hot-setting materials
- Apply during operation
- Limited to surface damage
- Temporary solution often
Tip: Proper surface preparation is 70% of repair success
Preventive Maintenance
Regular Inspections:
- Visual inspection after each campaign
- Measure erosion patterns
- Document damage progression
- Identify problem areas early
Extend Service Life:
- Address small issues before they grow
- Protect with coatings where appropriate
- Optimize operating procedures
- Maintain proper temperatures
- Avoid thermal cycling when possible
Cost Analysis:
- Track refractory consumption
- Calculate cost per ton of steel
- Benchmark against industry standards
- Identify optimization opportunities
9. Safety Tips
Personal Protection
Required PPE:
- Alkaline-resistant gloves (castables are caustic)
- Safety glasses or face shield
- Dust masks or respirators (during mixing)
- Protective clothing
- Steel-toed boots
- Hard hats in overhead work areas
Health Hazards:
- Skin contact: Caustic burns from alkaline materials
- Eye contact: Severe irritation or damage
- Inhalation: Silica dust (long-term health risk)
- Ingestion: Avoid completely
First Aid:
- Skin contact: Wash with plenty of water for 15 minutes
- Eye contact: Flush with water for 15 minutes, seek medical attention
- Inhalation: Move to fresh air
- Always have eyewash station nearby
Installation Safety
Hazards During Installation:
- Wet castable is slippery
- Working at heights (scaffolding)
- Heavy material handling
- Vibrator electrical hazards
- Confined spaces
Safety Procedures: ✓ Proper scaffold and fall protection ✓ Electrical safety for equipment ✓ Material handling equipment (no manual lifting of heavy items) ✓ Adequate ventilation ✓ Emergency access and egress ✓ Communication systems
Dry-Out and Heating Safety
Fire Hazards:
- Organic materials burning out
- Combustible gases from binders
- Provide adequate ventilation
- Keep fire extinguishers accessible
- Monitor continuously
Burn Hazards:
- Hot surfaces during and after dry-out
- Radiant heat
- Post warning signs
- Barricade hot areas
- Use proper hot-work procedures
Tip: Safety is never an accident - plan ahead and follow procedures
10. Cost Optimization Tips
Total Cost of Ownership
Calculate Beyond Material Price:
Total Cost = (Material + Labor + Equipment + Downtime + Energy) ÷ Service Life
Example Comparison:
Option A: Budget Castable ($450/ton)
- Installation labor: $200/ton
- Service life: 18 months
- Total installed: $650/ton
- Cost per month: $36/ton
Option B: Premium Castable ($800/ton)
- Installation labor: $200/ton
- Service life: 30 months
- Total installed: $1,000/ton
- Cost per month: $33/ton
Tip: Premium material costs 78% more but delivers 8% lower monthly cost through longer service life
Reducing Installation Costs
Labor Savings:
- Use self-flow castables (40-60% faster)
- Consider pumping for large volumes
- Pre-cast complex shapes off-site
- Optimize crew size and skills
- Minimize rework through proper procedures
Equipment Optimization:
- Rent vs. buy analysis
- Maintain equipment properly
- Train operators thoroughly
- Use right equipment for the job
Extending Service Life
Best Practices:
- Select proper material for service conditions
- Follow installation procedures precisely
- Implement proper dry-out schedule
- Optimize operating conditions
- Perform preventive maintenance
- Address small problems early
Typical Improvements:
- Proper material selection: +20-40% life
- Quality installation: +30-50% life
- Correct dry-out: +50% life
- Preventive maintenance: +15-25% life
Tip: Investment in quality installation pays back 5-10× through extended service life
Strategic Purchasing
Volume Discounts:
- 10-50 tons: 5-10% discount
- 50-100 tons: 10-15% discount
- 100-200 tons: 15-20% discount
- 200+ tons: 20-25% discount
- Annual contracts: Additional 5-10%
Supplier Relationships:
- Develop partnerships for technical support
- Share performance data for optimization
- Negotiate long-term agreements
- Consider vendor-managed inventory
- Request trials of new products
Conclusion: Keys to Refractory Castable Success
Success with refractory concrete requires attention to detail at every stage, from selection through installation, curing, and operation. The most expensive mistakes are often made trying to save time or money in critical steps.
Top 10 Success Factors
- Match material to service conditions - Neither over-specify nor under-specify
- Store materials properly - Moisture is the enemy
- Measure water accurately - Most critical mixing parameter
- Mix thoroughly - 3-5 minutes minimum with proper equipment
- Vibrate correctly - Not too much, not too little
- Cure adequately - Minimum 24-48 hours before heating
- Follow dry-out schedule - Never rush this critical step
- Inspect and document - Track performance for optimization
- Train personnel - Skilled installation is essential
- Calculate total cost - Look beyond material price
Quick Reference Guide
| Stage | Critical Factor | Common Mistake | Best Practice |
|---|---|---|---|
| Selection | Match to service | Price-only decisions | TCO analysis |
| Storage | Moisture control | Poor warehouse conditions | Dry, elevated, covered |
| Mixing | Water content | Too much water | Measure accurately (5-8%) |
| Installation | Vibration | Over or under-vibrating | Proper technique, training |
| Curing | Time allowed | Rushing to heat-up | Minimum 48-72 hours |
| Dry-out | Heating rate | Too fast at low temps | Slow, controlled schedule |
Final Recommendations
For Steel Mill Operations:
- Invest in proper equipment (mixer, vibrators)
- Develop installation procedures and train crews
- Track performance data systematically
- Build relationships with technical suppliers
- Consider Total Cost of Ownership in all decisions
- Never compromise on critical steps to save time
For Maintenance Managers:
- Schedule relining during planned shutdowns
- Ensure adequate time for proper installation and dry-out
- Stock appropriate materials ahead of need
- Maintain installation equipment
- Document performance for continuous improvement
For Procurement:
- Qualify multiple suppliers but don't constantly change
- Negotiate long-term agreements for price and supply security
- Consider technical support as part of value equation
- Balance cost reduction with performance needs
Remember
Refractory castables are not regular concrete - they require specialized knowledge, proper materials, quality installation, and patience during curing and dry-out. Cutting corners to save time or money almost always leads to premature failure and higher total costs.
The difference between a lining lasting 12 months vs. 24 months is usually not the material itself, but the quality of installation and dry-out procedures. Invest time and attention in getting these right, and the payback will be substantial.
Need Expert Guidance?
For technical consultation on refractory castable selection, installation procedures, or troubleshooting, contact experienced refractory suppliers who can provide:
- Material recommendations for specific applications
- Installation procedure development
- Training for installation crews
- On-site technical support
- Performance monitoring and optimization
0 Komentar
Artikel Terkait


© 2015 - 2026 Anak Teknik Indonesia